Follow my adventures in finding out how my local CSA produce was grown, growing my own produce, and embracing my inner “homemaker goddess” in the Good Eats series.
My favorite produce has arrived – Sweet Corn.
Maybe it is because I’m from the best state in the Union – Nebraska – and we produce a ton of it. Or maybe it is because my college football team is know as the Cornhuskers. Or maybe it is because I love carbohydrates…but I love sweet corn.
And not the crummy stuff that you find at Walmart. I’m talking about back-of-a-farmer’s truck, picked-this-morning, each-kernel-explodes, never-waxy-yummy-carbohydrate sweet corn. (Excuse me while I wipe the drool…)
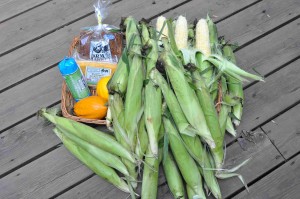
This week my Hen House CSA featured my second favorite farm (Bader’s Peaches being #1) – Andy’s Candy Corn from Columbus, NE. Hubs and I did a little trading and ended up with 60 ears of heaven on a cob. We also were blessed with Cheddar & Dill Cheese and Sausage from Good Nature Family Farms, Farm to Market Bread, and acorn squash from Twin County Family Farms – but really, it was about the corn.
I remember having frozen sweet corn as a girl. My grandmother – also known as best Farm Cook Ever – used to grown corn in her garden and freeze it every summer. She’d always pull it out when I came to stay with her or for family dinners at Christmas, Thanksgiving or Easter. That corn with a dollop of butter and a pinch of salt and pepper was almost better than dessert. Almost.
I know this goes without saying, but frozen sweet corn is LIGHTYEARS better than any store frozen or canned corn. There is no comparison, so I’m not going to even try. The good news is that corn is plentiful and not terribly expensive right now and it is incredibly easy to freeze – so embrace your inner home-econ goddess and freeze some – so you can enjoy it year-round.
Freezin’ Corn
Ingredients
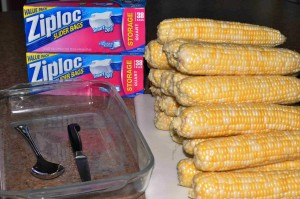
You’ll need 5-6 ears per quart freezer bag, so I would have at least 40 ears of corn. You will also need a pyrex dish for storage, a good knife, and a large stockpot (not pictured).
Step #1: Boil and Cut Corn
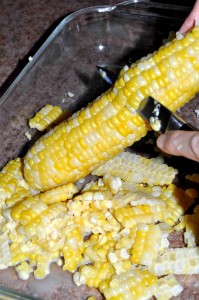
Shuck and wash corn. Fill large stock pot half-way with water and bring to a boil. Put several ears of corn into stockpot and boil for approximately three minutes. Corn will start to turn a more deep yellow color when it is ready, but don’t boil too long. Remove corn and place on platter to cool slightly. When cool to the touch, take knife and start slicing corn off the husk. Be careful not to go too deep – you just want the kernels, not the husk.
Step #2: Getting the Milk from the Corn
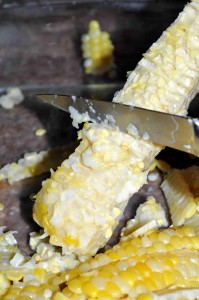
This is a keep or leave step. Hubs loves the corn-milky-mush (I’m sure that is a technical term) that this step makes. And doing this step also increases your yields.
However, if you are looking for more pristine corn kernels, then move on to Step #3. The trick to getting the corn-milky-mush is to flip your knife over and use the dull edge to “scape” all the leftover bits from the husk. It also helps intensify the flavor – since you are adding a concentrated “corn liquid” to your cut corn.
Step #3: Put the Corn Into Freezer Bags
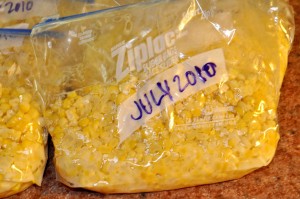
After you get between four to six ears done (depending on their size), place the kernels – and milk – into quart-size freezer bags. Push all excess air out of bag and label the bags with the date. Place them in your freezer, where they will be good for up to one year.
And just for the record – freezing sweet corn takes virtually no time. Hubs and I worked together and were able to do nine bags of sweet corn in about a half hour. Come this Thanksgiving – I’ll be more than happy I took those 30 minutes to have a side dish that could almost be labeled as dessert.
What about you? What do you like to do with sweet corn? Let me know in the comments.
